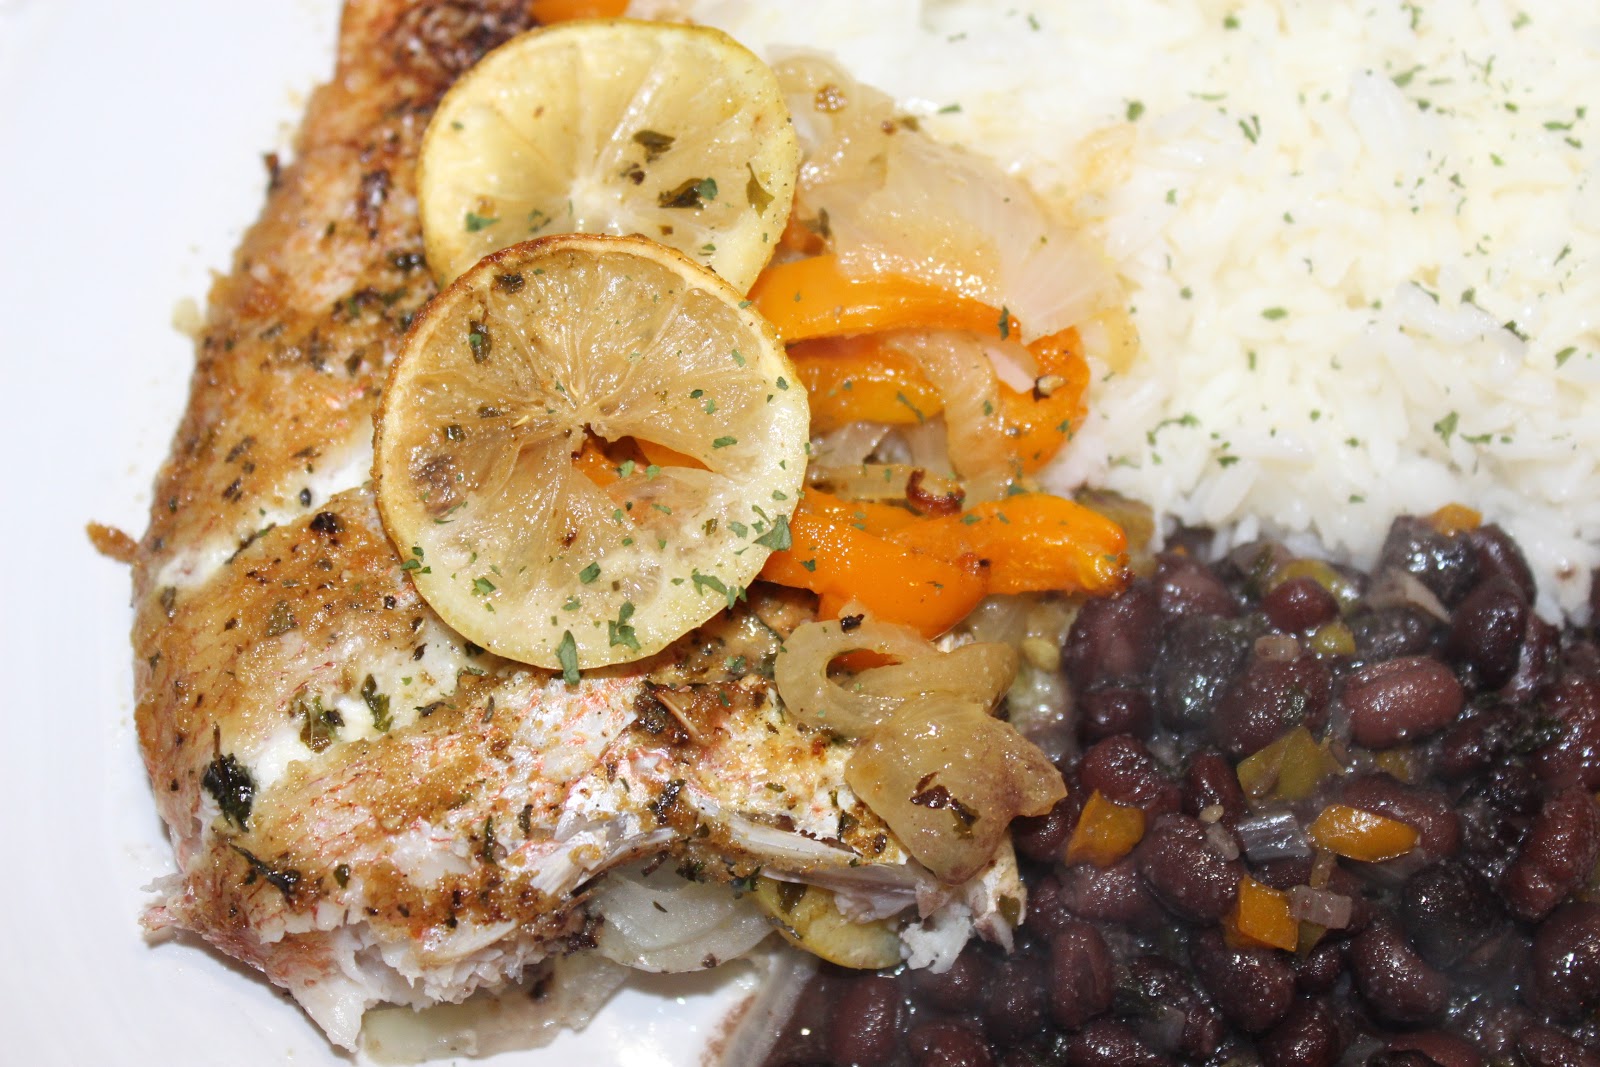
Whole Roasted Red Snapper with Peppers and Onions

30 October

Is it just me, or does the idea of making a whole fish at home seem intimidating? But no need to worry, this recipe will show you just how easy it really is.  Needless to say, I am so excited to share this recipe with you all!  I made this whole roasted red snapper last weekend for our Sunday dinner and I was blown away by how delicious it turned out.  It seriously tasted like it came directly from a restaurant kitchen!  The flavors were simple but oh so perfect.  

I have to admit I was a little skeptical when Cory suggested we get whole fish instead of having them filleted at the seafood counter.  I have never handled a whole fish before but I was certain with a few of my key spices and a simple roasting technique, this would come out perfect and I was right! 

I was super impressed by how flavorful and flaky the meat was.  It had the most buttery and soft texture and literally melted in my mouth.  

Big bonus: this is a "set it and forget it" type of dish so after you season and arrange the fish on the baking sheet, there really isn't much else to do but wait until it's done and devour it, being careful of the bones, of course.  No flipping required, like you would need to do on a grill.  

To reiterate, fresh whole fish = bones, but I'm cool with that. :)

Let's get started!

Ingredients:

3 Small Whole Red Snapper, 
1/2 Cup Avocado Oil, or Olive Oil

Seasonings for the Fish: 
3 Tablespoons Garlic Powder
3 Tablespoons Onion Powder
2 Teaspoons Dried Oregano
2 Teaspoons Ground Thyme
2 Teaspoons Dried Parsley
2 Tablespoons Salt
1 Teaspoon Fresh Pepper

1 Medium Onion, Sliced
1 Medium Yellow Pepper, Sliced
1 Medium Orange Pepper, Sliced
2 Small Lemons, Sliced

Seasonings for the Veggies:
1 Tablespoon Garlic Powder
1 Tablespoon Onion Powder
1 Teaspoon Dried Oregano
1 Teaspoon Ground Thyme
1 Teaspoon Dried Parsley
1 Tablespoon Salt
1/2 Teaspoon Fresh Pepper


{While you gather your ingredients, preheat the oven to 425 degrees. These will roast in a REALLY hot oven.}

{Most all seafood counters sell whole red snapper to be made at home.  We purchased these at Whole Foods. They will most likely be scaled and gutted and ready to be wrapped and purchased.  If they are not, I'm sure the person at the fish counter will be happy to do that for you.} 

{Cut two three inch long slits in each fish, cutting all the way to the bone.  This will prevent the fish from buckling or curling in the hot oven.}


{Drizzle each fish with a couple tablespoons of oil and brush both sides and the inside. Be generous with the oil, as it will aid in the skin getting crispy and brown.}

{Season evenly, on both sides and inside, with the seasonings: salt, pepper, onion powder, garlic powder, ground thyme, dried oregano.}


{Place a few onion slices and lemon slices inside of each fish.}


{On a large baking sheet, lay out your sliced peppers, onion and lemons.  Drizzle with a couple tablespoons of oil, sprinkle on the same seasonings and mix to coat the veggies evenly.}


{Arrange the snapper on top of the seasoned pepper, onion, lemon mixture.}

{Roast in a 425 degree oven for 50 minutes.  The skin will be golden, crispy and delicious!}

{And even though the fish skin is super golden, the flesh of the fish is soft, buttery and beyond flavorful! The juices of the lemon and onion placed inside the fish steams while cooking and permeates the fish and flavors it beautifully!  Not to mention the aromatic veggies.  I was so pleased with how this turned out.}

{As I mentioned earlier, this fish does have bones so be careful when eating. This dish is elegant enough to serve at a fancy dinner party and so so easy to just whip up on a busy weeknight.}


{Be sure to serve the fish with those yummy lemon slices and perfectly roasted onions and peppers. I decided to serve it alongside jasmine rice and seasoned black beans.  So BOMB!!!}


Let me know if you decide to make this! 

xoxo thanks for reading! 


Perfect Cauliflower "Fried Rice"

02 August

I was against the idea of cauliflower rice for the longest time.  For no reason other than being so in love with rice that I thought it was a waste to even try and substitute cauliflower for rice.  I mean come on! I mushy veggie that will pass as rice? I was not convinced.  UNTIL! Until I picked up some bags of frozen cauliflower rice from Costco and decided to play around with different recipes and techniques to create the absolute best fried cauliflower rice that you will ever have! And I think I nailed it. FINALLY!

The key to this recipe is you have to cook the "rice" very well and over moderately high heat.  This will dry the cauliflower until it crisps up just enough and enhances the texture to make it more rice-like. I decided to add Asian flavors but you can take this recipe in any flavor direction you wish. In 10 minutes I had a mound of flavorful goodness. I could not get over how good it was!


Ingredients:

2 Tablespoons Avocado Oil
3 Tablespoons Yellow Onion, finely diced
3 Tablespoons Red Bell Peppers, finely diced
4 Cups Frozen Cauliflower Rice
1 Tablespoon Granulated Garlic
1 Tablespoon Granulated Onion
1 Teaspoon Dried Parsley
Salt & Pepper to taste
2 Tablespoons Reduced Sodium Soy Sauce
1 Teaspoon Sesame Oil


{In a large non-stick saute pan over medium high heat, add your avocado oil, onions and peppers.  Lightly season with salt.}


{Saute for 3 minutes or so until the onions and peppers start to brown.}


{Add in your frozen cauliflower rice.}


{Over medium-high heat, stir constantly to brown and dry out the frozen cauliflower.  Make sure it is perfectly mixed with the onion and pepper mixture.  Continue to brown for about 4 minutes.}


{Add in your seasonings: granulated garlic, granulated onion, fresh cracked black pepper, dried parsley.  Mix well and let sauté for a minute or two more.}


{Continue to mix until each piece of cauliflower is perfectly seasoned and has contacted the hot pan surface.  Evenly spread the mixture out and create a single layer so that the rice crisps up a bit.  I think this is key for a true rice-like texture.  Cooked cauliflower can become mushy, and in my opinion, can develop a very unpleasant texture. By sautéing the riced cauliflower over a moderately high heat, and in a thin layer, it will brown perfectly without steaming and becoming mushy.}


{After about two minutes, remove the pan from the heat and add in your soy sauce and sesame oil. Mix well, serve immediately and enjoy!} 


This could not be more rice-like; I was so blown away when I tasted it. The texture is there, the flavors are there. Imagine this with some cooked shrimp for shrimp fried rice or with little nuggets of chicken for chicken fried rice!


Because I am limiting the amount of carbs I am eating, I had this with a seared tuna steak and literally licked the plate clean. I now know what I will be eating for the next few weeks, won't you join me? :)


Easy Sweet & Spicy Kale

19 May

This has been one of my favorite go-to side dishes to make for a really long time.  I always forget how good it is until I make it again and the pan is gone in 2.5 seconds, haha - my family absolutely loves when I make this. This is an unusual way to have kale as it has a sweetness that is kind of unexpected.  After taking a bite though, you will question why you are not sprinkling sugar on every single green veggie that you eat. LOL :)

A simple little recipe like this is good to keep in your repertoire to whip together and impress your family on a weeknight or for Sunday dinner. Not only is this super easy to make, it requires very few ingredients; win and win, if you ask me! Plus, what a delicious way to get more greens in, if that's a goal of yours.

Ingredients
2 Tablespoons Extra Virgin Olive Oil
1 Medium Onion, Chopped
2 Tablespoons of Crushed Red Pepper Flakes {or less if you can't take that much heat}
3 Cloves Garlic, Crushed
4 Cups Chopped Kale {or 1 large bag from produce section}
4 Tablespoons Sugar
1/2 Cup Chicken Broth {or veggie broth, for a vegan option}


{In a large pan over medium high, heat the olive oil and saute your onions and red pepper flakes until fragrant and just starting to become translucent, about 3 minutes.  Then add in your crushed garlic and saute for a minute more.}

{Add in your kale.  You will want to do this in batches, coating each handful with the oil, onions and garlic mixture, so that it wilts down a bit.  Otherwise, your pan will be overflowing and it will be difficult to mix. Once the kale is in the pan and has started to wilt, season with salt and pepper.}

{Sprinkle in your sugar and mix well.}

{Next in goes the chicken or veggie broth.}

{Turn the heat down to medium {not too low!} and let this simmer on the stove for about 15 minutes, stirring it once or twice.}

{After about 15 minutes, the broth evaporates and together with the sugar, creates this flavorful glaze on the kale.  It's sweet, spicy, savory, garlicky and so very delicious. There is a serious amount of flavor here and a couple of ingredients. If that is not perfection in a side dish, I don't know what is!}

{Serve it up piping hot and watch it disappear in minutes! :) I love making this whenever we have grilled or fried chicken and macaroni and cheese.  It is THEE perfect pairing. 

Let me know if you try this, I'd love to hear what you think!